The Polarizer Tool
The polarizer is an essential tool for any landscape photographer and is the perfect companion to the neutral density graduated filter. Here is an article to getting the best out of the polarizer properties.
It happened to all of us, especially we started to develop the first interest in photography and we still did not understand exactly how certain techniques work, not knowing how to capture exactly what we saw with the camera sensor. As a result, maybe we took a photo on a beautiful day, with a blue sky dotted with plump clouds, but the result – a washed-out sky – does not correspond to what we would see with the naked eye when we had taken that image. The solution to this very common problem is in the polarizing filter, which almost magically can help transform pale skies into blue skies, remove reflections from any material, from glass to water, and in general reduces too harsh and distracting contrasts from the scene.
How does it work? Most of the natural light is diffused in different directions, but sometimes the light moves in one direction – for example, the light reflected by the water is polarized, with all the waves vibrating on the same axis. This is the light that the polarizing filter affects. The filter acts like a blind on the microscopic plane, blocking some light waves and allowing others to pass.
Also Read: Best Linear Polarizer is for sale at low price!
Linear Polarizer or Circular Polarizer?
Here are two different types of polarizer: one is called linear and the other circular. The name can be confusing at the beginning, because it does not refer to the shape of the filter. In fact, a circular polarizing filter can be square. The name refers to the way each type of filter polarizes light. The circular polarizer works with any type of camera, old or new, and whatever technology it uses. The linear polarizer, on the other hand, can only be used with manually operated cameras. This is because the linear polarizer interferes with the auto focus function and with the exposure measurement of modern DSLRs, while the circular polarizer does not.
How to use the Polarizer:
3d polarizer can have a square or circular shape. The circular filter attaches to the filter holder with a dedicated adapter. The square version instead fits into the filter holder slot as well as the other filters – since the polarizer must be rotated, in this case the entire filter holder must be rotated with any other filters inside. For this reason, most landscapers prefer the round type which can be rotated independently of all other filters that may be used. As already mentioned, one of the main reasons to use the polarizer is to cut out the polarized light rays of the sky, with the effect of making the sky a more intense blue in the final image.
The polarizer is effective even when there are many clouds in the sky and only small splashes of blue – especially when shooting at a 90 ° angle from the sun. The polarizing effect is always stronger at this angle than when standing in front of the sun or at 180 °, facing away. When using the polarizer you need a bit of judgment: you may be tempted to rotate the filter for maximum effect, but sometimes this can result in a sky that seems retouched and false. The most reliable way to use the polarizer is to remove it from the camera, observe its effect by looking through it as you rotate it, stop when you get the desired effect and hook it to the camera while maintaining its position. The result remains more accurate than when trying to understand the effect through the viewfinder or live-view.
Since the polarizing filter reduces the amount of light more or less depending on how much it is rotated, the filter factor also varies. Normally a compensation of 1.5 / 2 is sufficient. To get an accurate exposure reading, attach the polarizer once you have found the desired position, and then take the measurement through it.
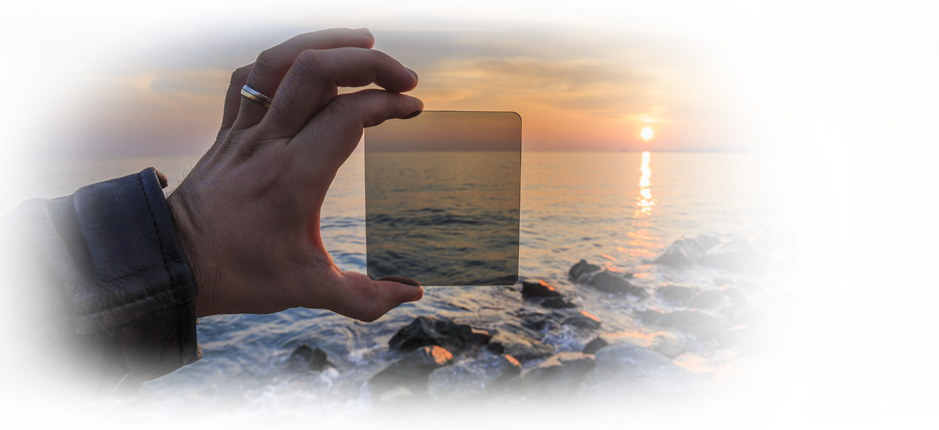
Without the Polarize and With the Polarize:
The polarizer has a large number of uses that go beyond simply increasing the depth of the sky. It is extraordinary to enhance the colors of autumn. If you are shooting in a forest after the rain, the polarizer will remove the patina or reflection of any trace of water. This helps to saturate the golden, orange and yellow colors that we associate with this time of year. The removal of reflections emphasizes the colors and atmosphere of a scene like this.
It is also the filter of choice to remove haze, allowing you to see further in the image, in other words giving the image greater depth. As a result, it allows you to shoot even in non-ideal conditions with good results. In short, it allows photographers to shoot in non-ideal situations. The effect can be particularly attractive when combined with a long exposure filter and it means that the hours of light that we usually consider good (as early in the morning or late afternoon) are stretch. The role of the polarizer is to give the image a final touch, either by removing unwanted reflections (e.g. reflections on the windows of a building) from a long exposure shot or by making the bubbles on the surface of the water sharper.
Kat Irving is a reporter for Diving Daily. After graduating from NYU with a master degree in history, Kat got an internship at WABC-TV New York and worked on profiling local businesses. Kat was also was a columnist for the NPR. Kat mostly covers business and community events here at Diving Daily