If you are looking for a unique friendship bracelet design, then you can’t miss this guide on how to make a friendship bracelet with beads. Moreover, this collection of opal bracelets from thebracelets.com.au can also be a great consideration for you in this regard.
While we’re all staying at home during the pandemic, it can be hard to share nice moments with friends. But you can still show your friends you care.
Learning how to make a friendship bracelet is the gift that keeps on giving. Once you get comfortable making these, you can make a handy holiday gift or just-thinking-about-you keepsake anytime you want! Here’s how to get started on one of our favorite beginner-friendly designs.
Get Your Cord
To make the classic paracord beaded friendship bracelet, you’ll need some paracord in your favorite color. This technique will also work just fine with any other string or cord material you want to use—just make sure the diameter of the cord is smaller than the holes in the beads you want to use.
The length of the cord you need will vary based on wrist size, but you’ll need four long sections of cord. The middle two can be shorter than the outer two, which should be at least a few feet long. You can always cut later, so err on the long side.
Decide On Your Bead Design
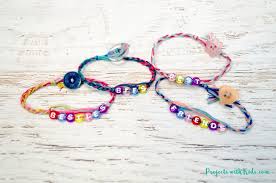
How do you want your beads to be arranged? If you’re using alphabet beads, you can make a thoughtful bracelet that spells out a name or word. And you can use spaces as well if you’d like.
Beyond the alphabet beads, though, there are lots of different bead designs to try. If you learn your favorites names of bead shapes, you’ll be able to shop for the exact look you want.
Get Started on the Knots!
First, secure the starting point by tying or taping it to something heavy, like a table. You should see four pieces of cord in front of you. Take the leftmost piece and pull it loosely over the two middle pieces and under the rightmost piece.
Don’t pull it tight yet! Now, take that rightmost piece and do the opposite. Pull it under the two middle pieces and over the leftmost piece, through the loop you’ve created.
Then pull tight and alternate the pattern. Cross the rightmost piece over the two middle pieces and so on. And just keep alternating!
Loop Your Beads In
When it’s time to add your beads, you won’t have to change much about your knot technique. Just string the bead on the leftmost cord (or rightmost, if you’re on the alternation) before doing your knot. To keep it secure, only add a bead on every other knot—so if you’ve started by stringing a bead on the leftmost cord, keep adding future beads only on the left-side alternation.
Then, when you’re done with the bead portion, you can keep making your usual knots.
How to Make a Friendship Bracelet Ending
If you’re comfortable using a lighter or match, you can use fire to gently melt the ends of paracord and make sure the bracelet won’t unravel. And if not, or if you’re using a cord material that doesn’t melt, you can always use an adhesive or a few tight knots.
You can also get creative with a bit of hardware. For example, you can tie each end of the friendship bracelet to a piece of a buckle so it can snap together.
Try It For Yourself!
The best way to get a handle on how to make a friendship bracelet is to fiddle around with the materials yourself. You might soon find that the creative expression and focused craft work of this process are almost as enjoyable as giving the bracelet to your friend.
If you want to learn more about how people are making it through their day-to-day lives with a bit of fun, check out the other articles on our site!