Did you know that a clothes dryer, on average, can last for 13 years? Interestingly, dryer vents made of steel can last even longer: up to two decades!
However, those estimates still depend on how often you use your dryer and the maintenance you give it. A lack of upkeep can cut its life short or even give rise to disasters like house fires.
Likewise, committing common dryer maintenance mistakes can lead to its early failure. So, even if you do clean it, as long as you’re doing it wrong, it may still not last as long.
Don’t worry, though, as we’re here to help you avoid such errors. So read on, as our tips can also help prevent common dryer issues.
1. Not Cleaning the Exterior Every Week
Many areas in the US get hard water, or water with a calcium carbonate content of 121 to 180 milligrams per liter. Other places even get very hard water, containing over 180 mg/L of calcium carbonate.
If you get hard water yourself, you may have noticed how your just-washed clothes still feel soapy. And it’s not only a feeling. Detergent does tend to cling to fabrics washed in hard water.
That’s due to the reaction between the detergent and the calcium content of the water.
Some of that residue can stick to your dryer’s exteriors if you set your freshly-washed laundry on top of it. So unless you wipe down its outside surfaces at least once a week, you can expect soap to form on it. Limescale, a crusty substance formed when hard water evaporates, can also develop.
For a more thorough removal of soap residue and limescale, you can use lemon juice or vinegar. Experts recommend a 50/50 solution of white vinegar and water. Dampen a clean rag with this mixture and wipe away.
2. Cleaning Only the Dryer’s Exterior Surfaces
Even if you use your dryer to dry freshly washed laundry, residue can still build up in its interiors. For example, overuse of fabric softeners can leave a sticky layer on the drum over time. Ultimately, that can cause more lint to stick to the inside of the machine and its filter.
After every load, wipe down your dryer’s interior surfaces to prevent such problems. To remove the residue, you can use a clean rag dipped in some soapy water. You can then give it a thorough rinse with another piece of cloth moistened with plain water.
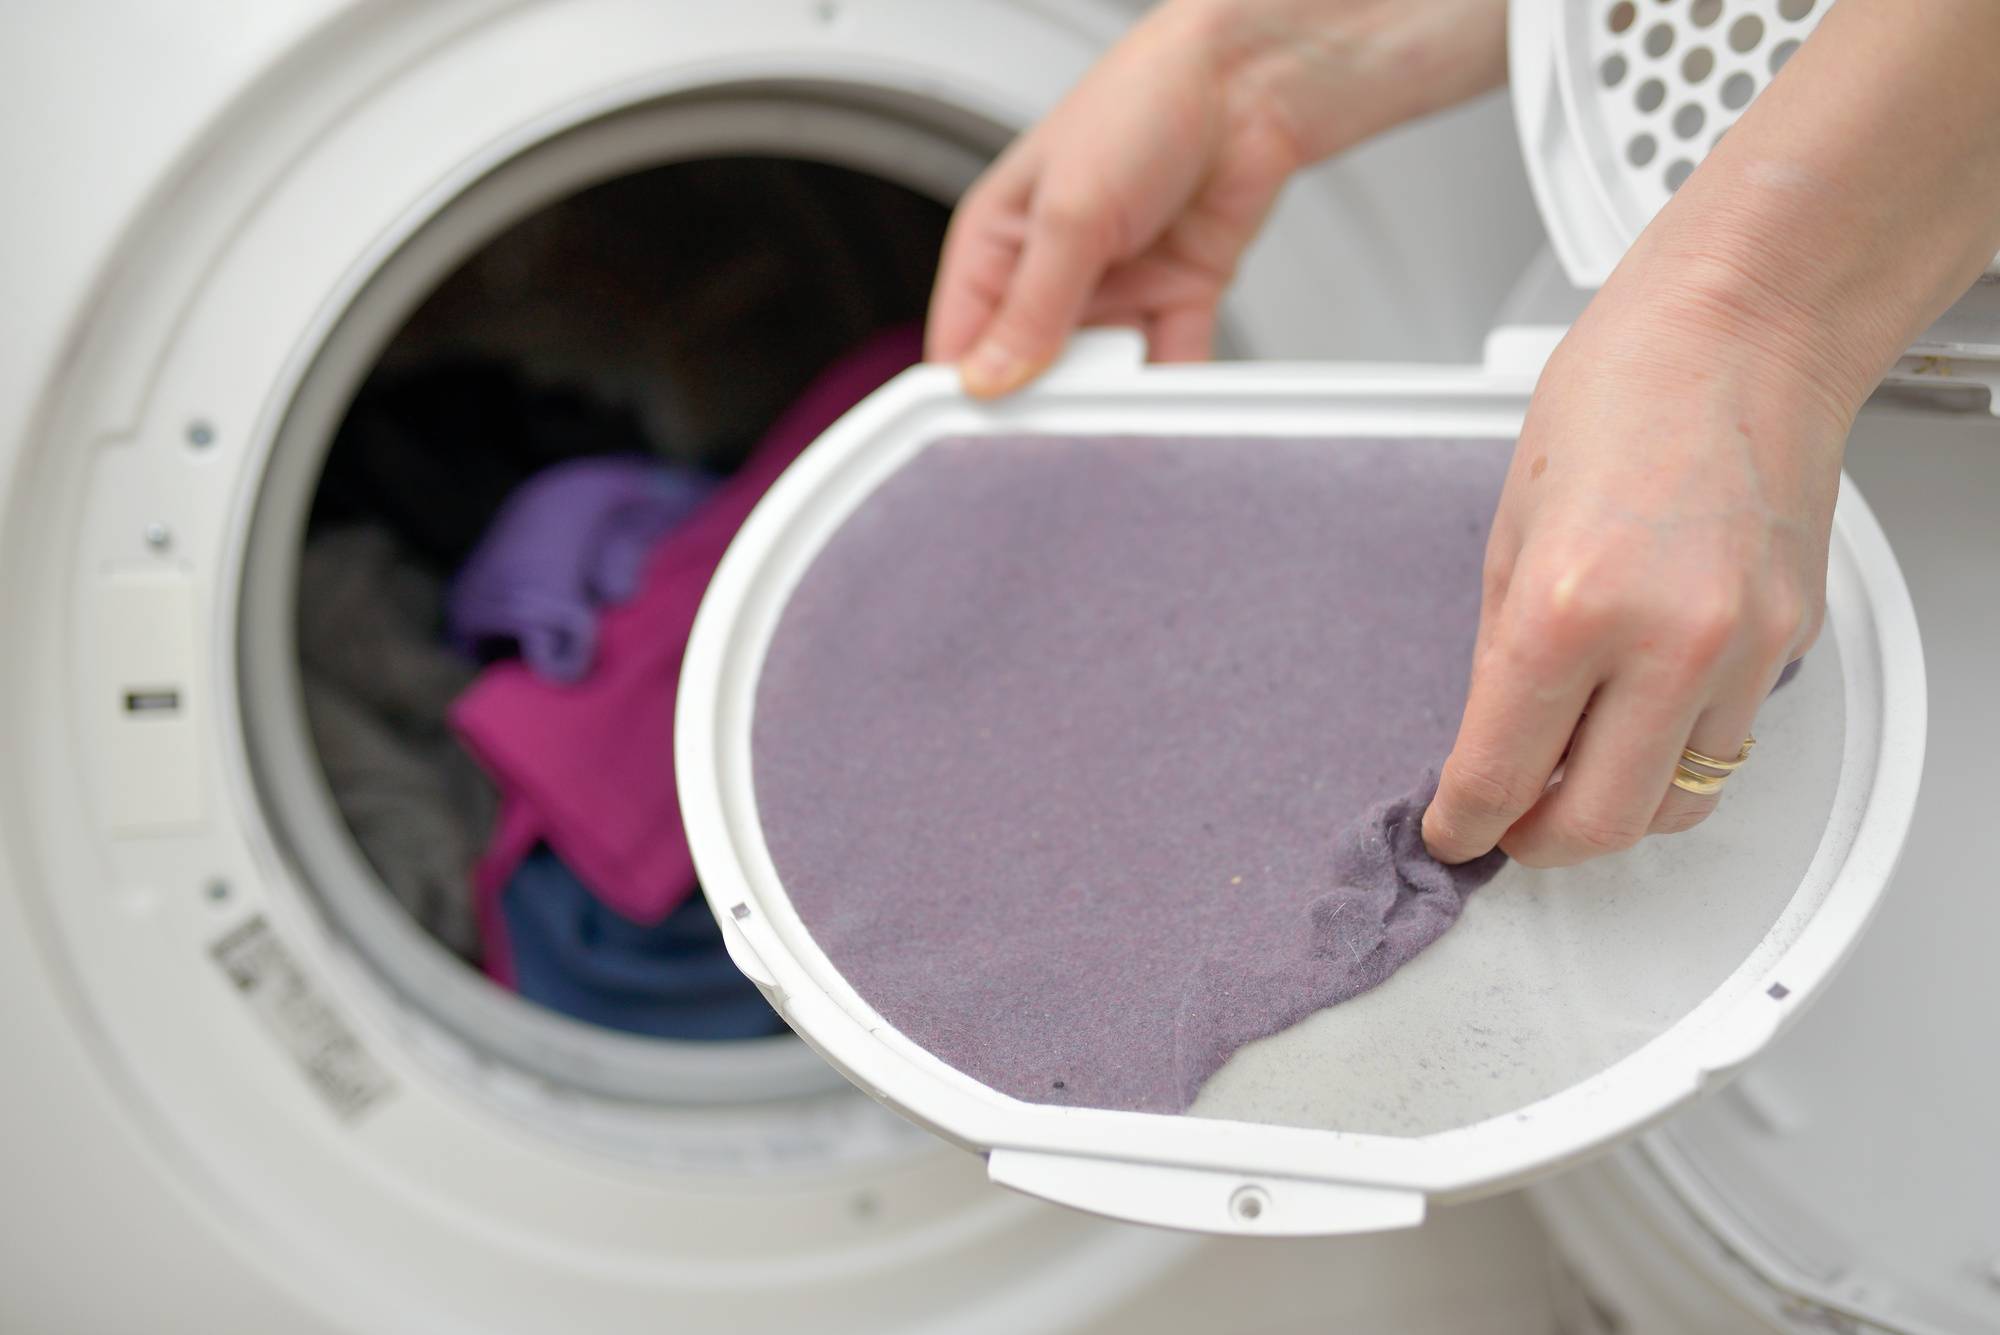
3. Removing Lint Only After Several Loads
As fabrics tumble around in the dryer and get exposed to high heat, they shed some of their fibers. The lint screen’s job, in turn, is to catch many of those fibers. It’s a crucial role that prevents the dryer vent hose from becoming obstructed.
Your clothes always shed some fibers in the dryer, so it’s best to remove them from the lint screen after every load.
One reason is that even a thin layer of lint can already obstruct the screen. That can lead to impaired airflow, resulting in your dryer needing more time to dry your clothes. That can then cause a spike in its energy use, simultaneously increasing your bills.
Another reason is that lint is flammable, so it can catch fire when exposed to the dryer’s high heat. Indeed, approximately 2,900 cases of home dryer fires get reported each year in the US alone. One in three of those events results from failure to clean the appliance.
4. Forgetting to Clean the Trap Itself
The lint screen is only the meshed filter that covers the lint trap. So, some fibers can still pass through it, get into the trap, and, from there, make their way to the dryer vent hose.
You can prevent that by vacuuming the trap before or after using the dryer.
5. Not Cleaning Dryer Vents Twice Yearly
A dryer vent’s role is to remove the excess heat generated by the dryer during every cycle. It’s there to prevent high temperatures from triggering fires.
Over time, though, the dryer vent can start to fill up with particles that bypass the lint screen and trap. That can result in longer drying cycles and higher energy use and bills. Worse, the excess heat it should be venting can combust the lint build-up.
So, have a pro inspect and clean the vent every six months for your family’s safety and your dryer’s longevity. However, you might want to bump that up to once every three or four months if you have a larger-sized household.
6. Neglecting the Outdoor Vent Cap
If you have an outdoor dryer vent, it comes with a hinged slat or door cover. That cap opens to allow moisture and lint residue to escape whenever you run the dryer. Thus, it can also become clogged with lint and outdoor dust, dirt, debris, and foliage.
For safety reasons, clean the outside dryer vent cap once every quarter. You can use a long-handled wire vent brush to remove build-up inside the cover. You can then switch to a scrub brush or cleaning rags to eliminate residue from the cap.
You can also hire an expert to perform this regular dryer maintenance task. You can request the pro to carry it out with dryer vent hose cleaning. Having both done in the same service call may cost less than if you schedule them on different dates.
7. Overlooking Maintenance and Repair Warranty
Most appliances, including dryers, come with a one-year warranty. However, you may have also purchased an extended warranty, bumping that up by a few more years.
If that’s the case, hire a dryer repair service that honors your appliance warranty. Doing so ensures warranty compliance, according to https://cbeuptime.com/our-services/compressor-dryer-repair/. Otherwise, you might void that protection and end up paying out of pocket for parts or services.
Avoid These Common Dryer Maintenance Mistakes
And there you have it, the most common dryer maintenance mistakes you should avoid at all costs. If you’ve been committing them, now’s the best time to stop, as your appliance might fail early. Worse, it might trigger a house fire.
Did you find this article informative? If so, we have other guides to share with you, so feel free to browse more of our blog now!